
An e-signature integration lets your Ruby service own the full signing loop instead of sending people out to another product. That keeps the workflow inside the app your users already know, and it removes the extra tabs and handoffs that usually slow the document signing process down.
In this blog post, we'll show you how to easily add e-signing into your own application using Formable. Formable offers a robust Ruby SDK and detailed documentation to make the integration process as easy as possible.
What you'll need:
- Ruby 3.1 or newer
- A Formable account (paid or free sandbox)
- An API key from Formable account settings
Why an e-signature API from Ruby?
Say you write Ruby for a clinic operations platform. Each visit still needs a consent form signed by the patient before care starts. When that lives in email attachments and a shared drive, the latest file goes missing, nobody can tell who has signed, and appointments slip. By integrating with Formable, all those manual signing processes can be automated within the clinic.
Step 1: installing the Formable Ruby SDK
bundle add formable
Note:
For more details and advanced usage, you can also reference the Official Formable Ruby SDK Documentation.
Step 2: creating the client
Create one client in an initializer. Request hashes take snake_case keys (template_id, field_id). Responses come back in the API's camelCase (templateId, fieldId).
# config/initializers/formable.rb
require "formable"

FORMABLE = Formable.new(api_key: ENV.fetch("FORMABLE_API_KEY"))
Step 3: create a template from your document
A template is the re-usable document where you or your users place the fields for the signers to fill in.
Signer roles are optional for single signers. If you need to support multi-party signing, they are required as you need to specify which role needs to fill out which field.
result = FORMABLE.templates.create(
  file: "consent.pdf",
  signer_roles: [
    { name: "Patient", order: 0 },
    { name: "Witness", order: 1 }
  ]
)

template_id = result["templateId"]
puts result.dig("editTemplateAccess", "editUrl")
Open the edit URL, place at least one required signature field, assign it Patient. The URL expires after a day:
edit = FORMABLE.templates.create_edit_url(template_id)
puts edit["editUrl"]
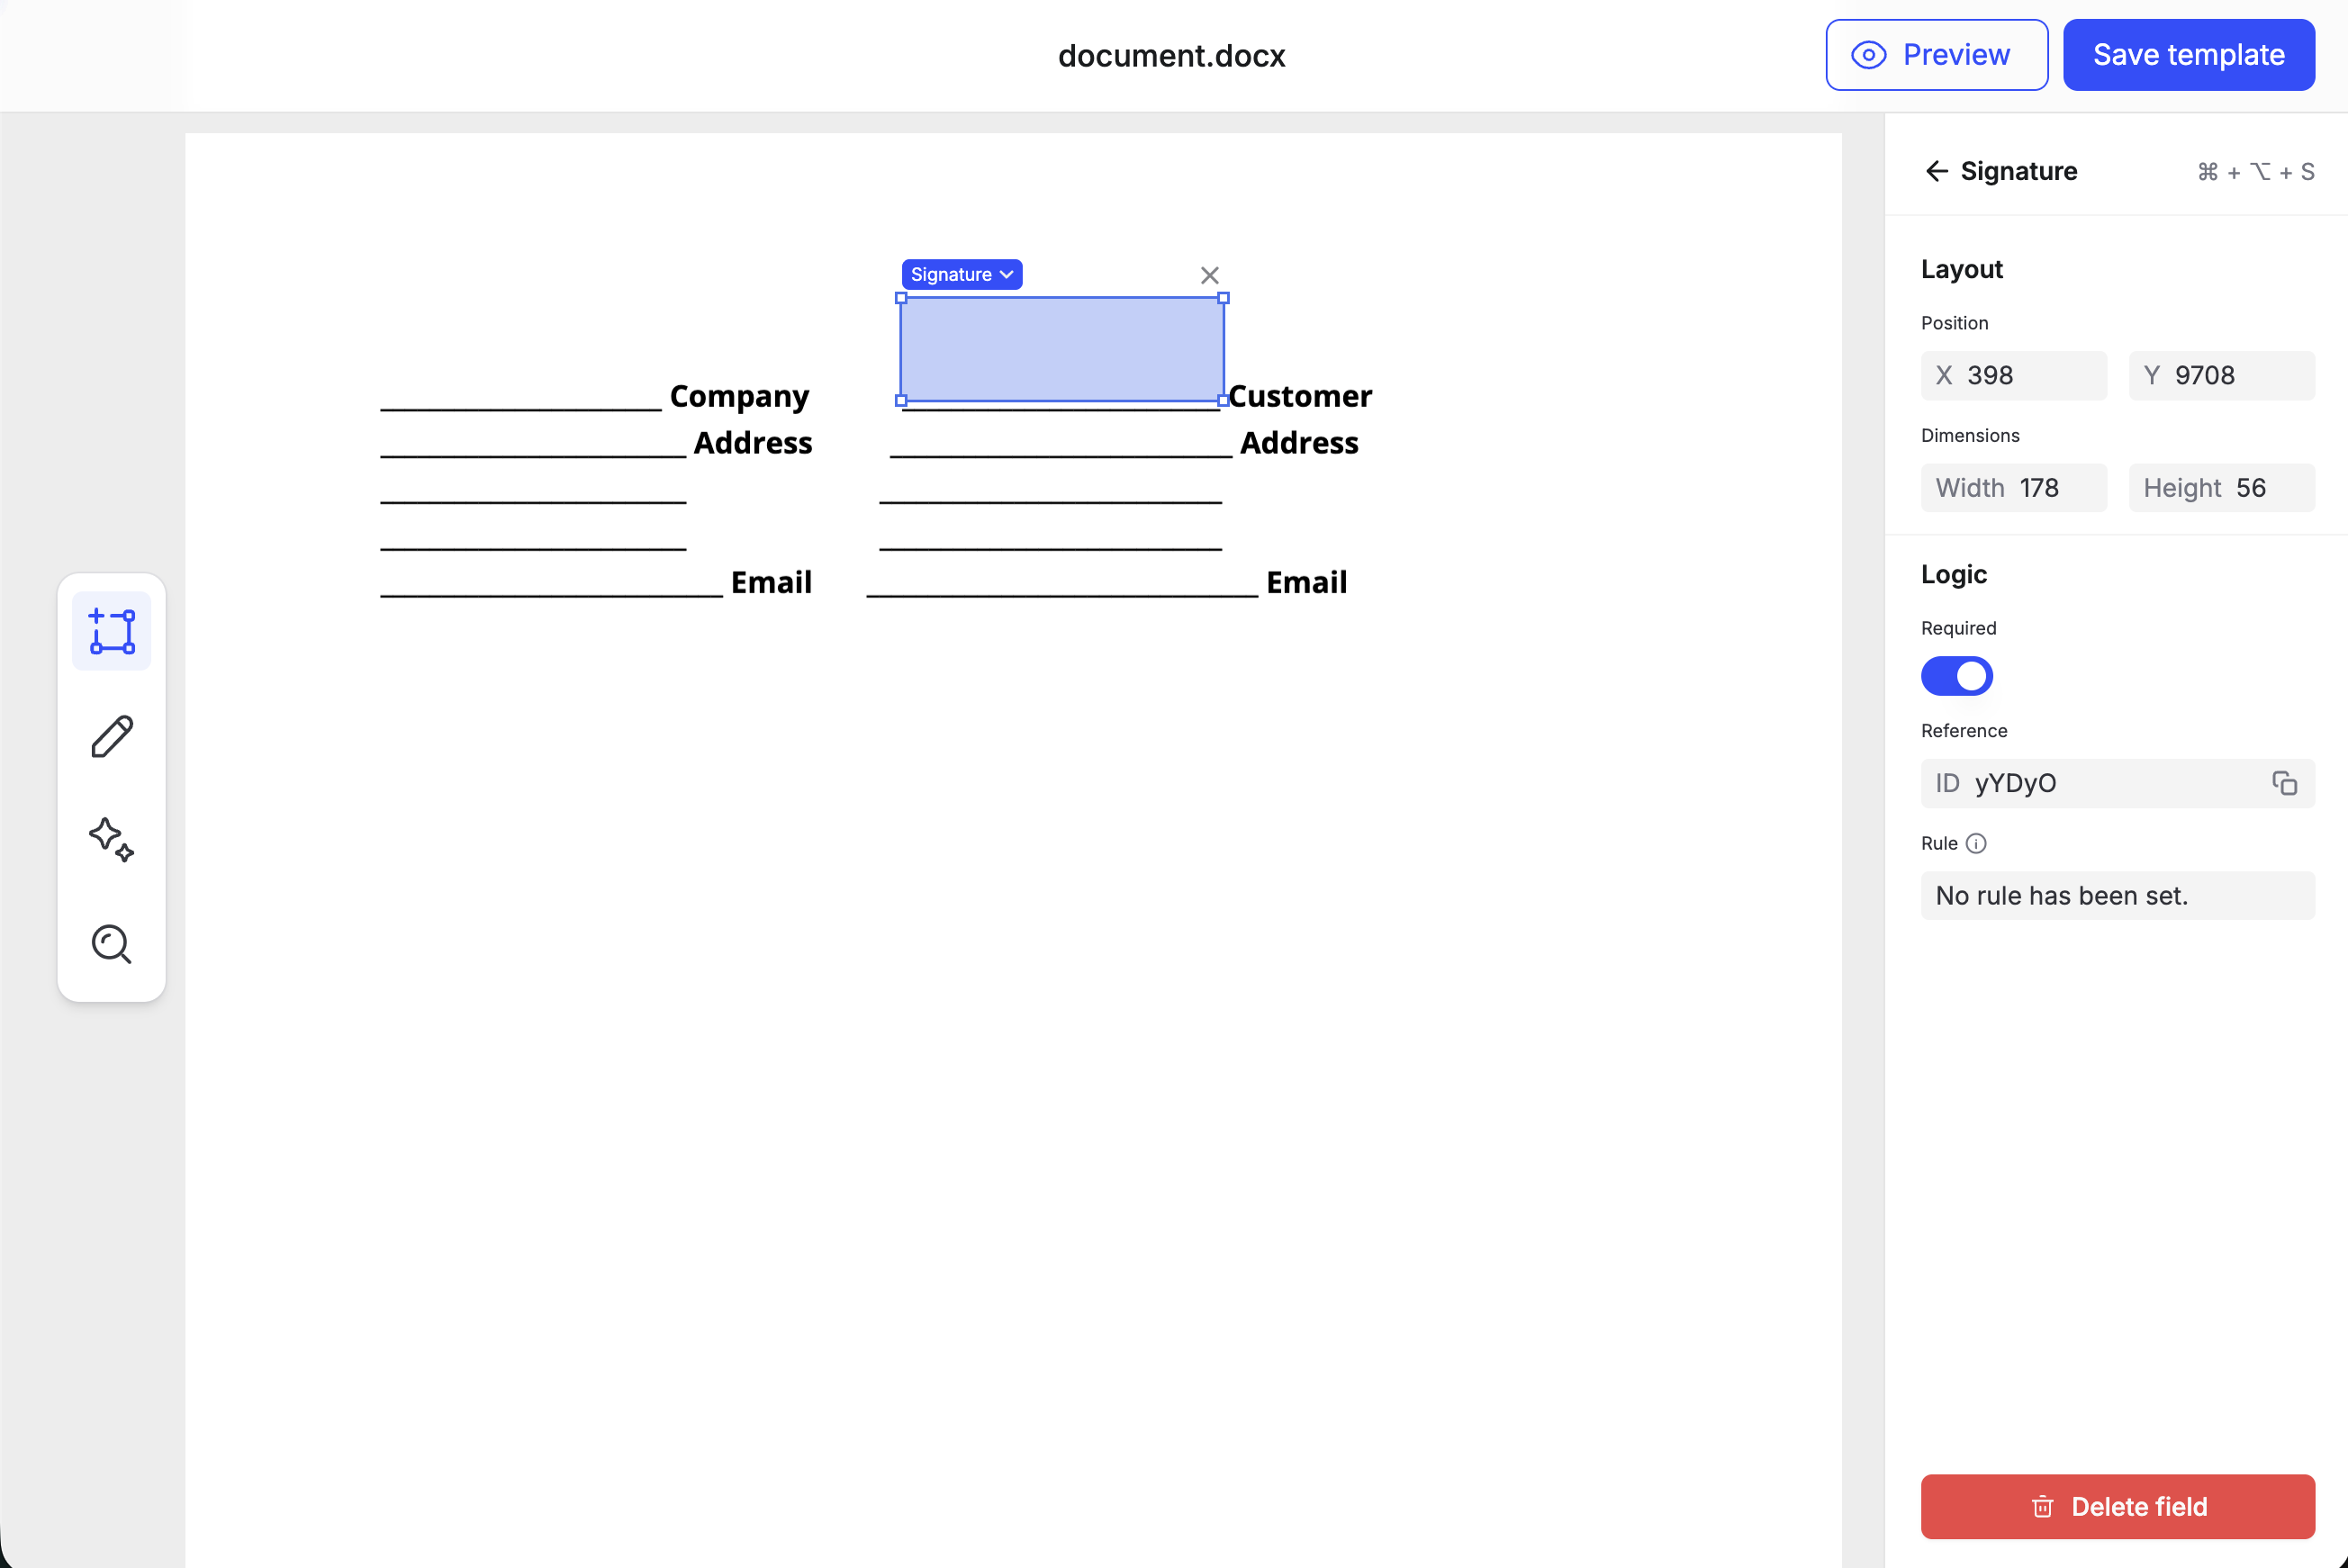
Save template_id and reuse it for later signature requests.
Step 4: choose a signing flow
You can choose to send a signing link via email to your user, or have your user sign within your own application within an iFrame.
If choosing email delivery, implement using the following code snippet.
request = FORMABLE.signature_requests.create(
  template_id: template_id,
  signers: [
    { email: "jane@example.com", name: "Jane Doe", role: "Patient" },
    { email: "witness@yourco.com", name: "Alex Chen", role: "Witness" }
  ],
  test_mode: true
)

puts request["signatureRequestId"] # save this
If you want your users to sign inside your application, the next section will show you how to implement the iframe path.
Step 5: embed signing in Rails
Embedded signing requires two server calls.
First: Create the signature request.
Second: Mint a short-lived signing URL using the id from the signature request.
# config/routes.rb
Rails.application.routes.draw do
  post "/api/signature-requests", to: "signature_requests#create"
  get "/api/signing-url", to: "signature_requests#signing_url"
end
# app/controllers/signature_requests_controller.rb
class SignatureRequestsController < ApplicationController
  skip_before_action :verify_authenticity_token, only: :create

  def create
    signer = params.require(:signer).permit(:email, :name)

    result = FORMABLE.signature_requests.create_embedded(
      template_id: params.require(:template_id),
      signers: [{ email: signer[:email], name: signer[:name], role: "Patient" }],
      test_mode: true
    )

    render json: {
      signatureRequestId: result["signatureRequestId"],
      recipientSignatureId: result["signers"].first["recipientSignatureId"]
    }
  end

  def signing_url
    signing = FORMABLE.signature_requests.create_signing_url(
      params.require(:recipientSignatureId)
    )
    render json: { signingUrl: signing["signingUrl"], expiresAt: signing["expiresAt"] }
  end
end
On the client, fetch the URL from your Rails app and load it in an iframe. Formable posts onSigningComplete to the parent window:
const { signingUrl } = await fetch(
  `/api/signing-url?recipientSignatureId=${recipientSignatureId}`
).then((res) => res.json());

document.getElementById("signing-frame").src = signingUrl;

window.addEventListener("message", (event) => {
  if (event.origin !== "https://app.formabledocs.com") return;
  if (event.data?.type === "onSigningComplete") {
    // close the iframe or show a success state
  }
});
<iframe
  id="signing-frame"
  width="100%"
  height="800"
  allow="fullscreen"
  style="border: none;"
></iframe>
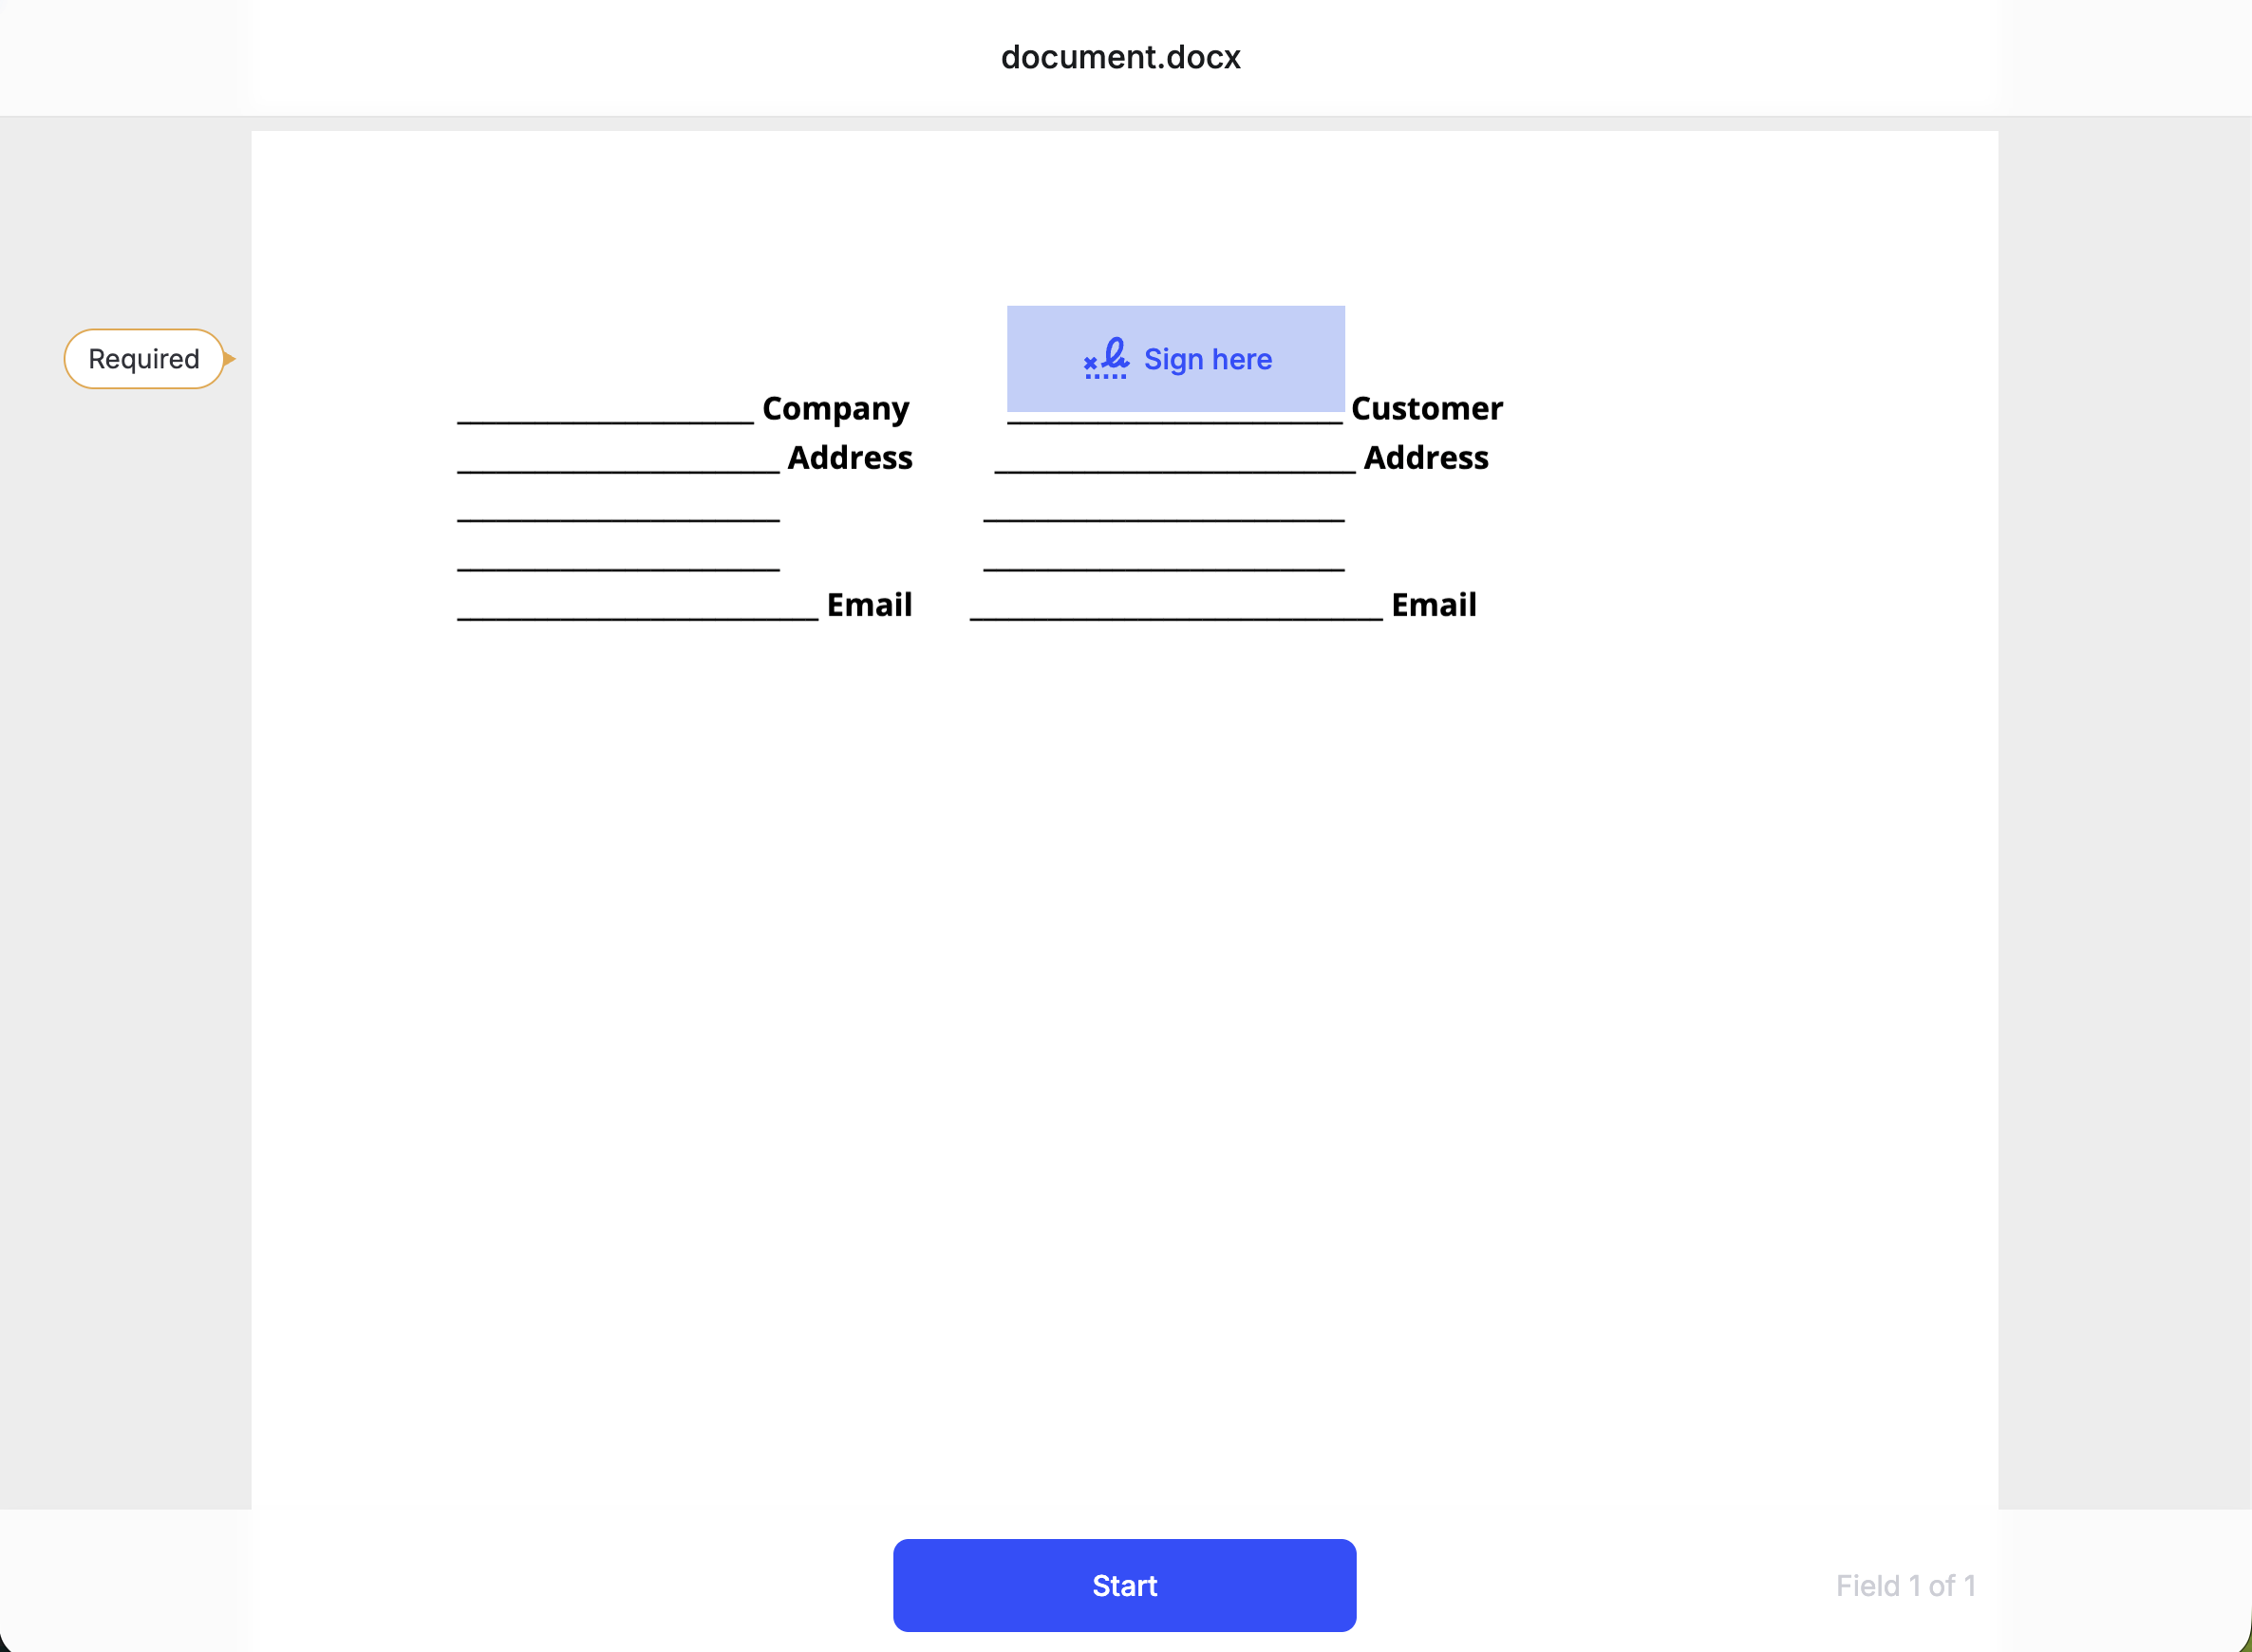
Step 6: handle webhooks
Register the path in Settings and keep the secret. Use request.raw_post. Skip verify_authenticity_token on this controller only. Hashing a re-encoded JSON object will fail verification.
# config/routes.rb
post "/webhooks/formable", to: "formable_webhooks#create"
# app/controllers/formable_webhooks_controller.rb
require "base64"
require "openssl"

class FormableWebhooksController < ApplicationController
  skip_before_action :verify_authenticity_token

  def create
    raw_body = request.raw_post
    received = request.get_header("HTTP_CONTENT_SHA256").to_s
    secret = Base64.decode64(ENV.fetch("FORMABLE_WEBHOOK_SECRET"))
    expected = Base64.strict_encode64(OpenSSL::HMAC.digest("SHA256", secret, raw_body))

    unless received.bytesize == expected.bytesize &&
           OpenSSL.fixed_length_secure_compare(expected, received)
      head :unauthorized
      return
    end

    payload = JSON.parse(raw_body)

    if payload.dig("event", "event_type") == "document_completed"
      envelope = FORMABLE.signature_requests.get_signed_envelope(
        payload.dig("signing", "signature_request_id")
      )
      # download envelope["signedEnvelopePresignedUrl"], store the PDF
    end

    head :ok
  end
end
document_completed is the terminal event. Once you receive this event, this means all parties have signed the document, and you may now fetch the signed document.
Alternatively, if you don't want to expose a webhook endpoint, you can poll for signature request status updates.
current = FORMABLE.signature_requests.get(signature_request_id)

if current["status"] == "Completed"
  # safe to download
end

recent = FORMABLE.signature_requests.list(updated_since: Time.now.utc - 86_400)
Step 7: download the signed PDF
The signed envelope URL is a short-lived presigned link.
require "net/http"

envelope = FORMABLE.signature_requests.get_signed_envelope(signature_request_id)
pdf = Net::HTTP.get(URI(envelope["signedEnvelopePresignedUrl"]))
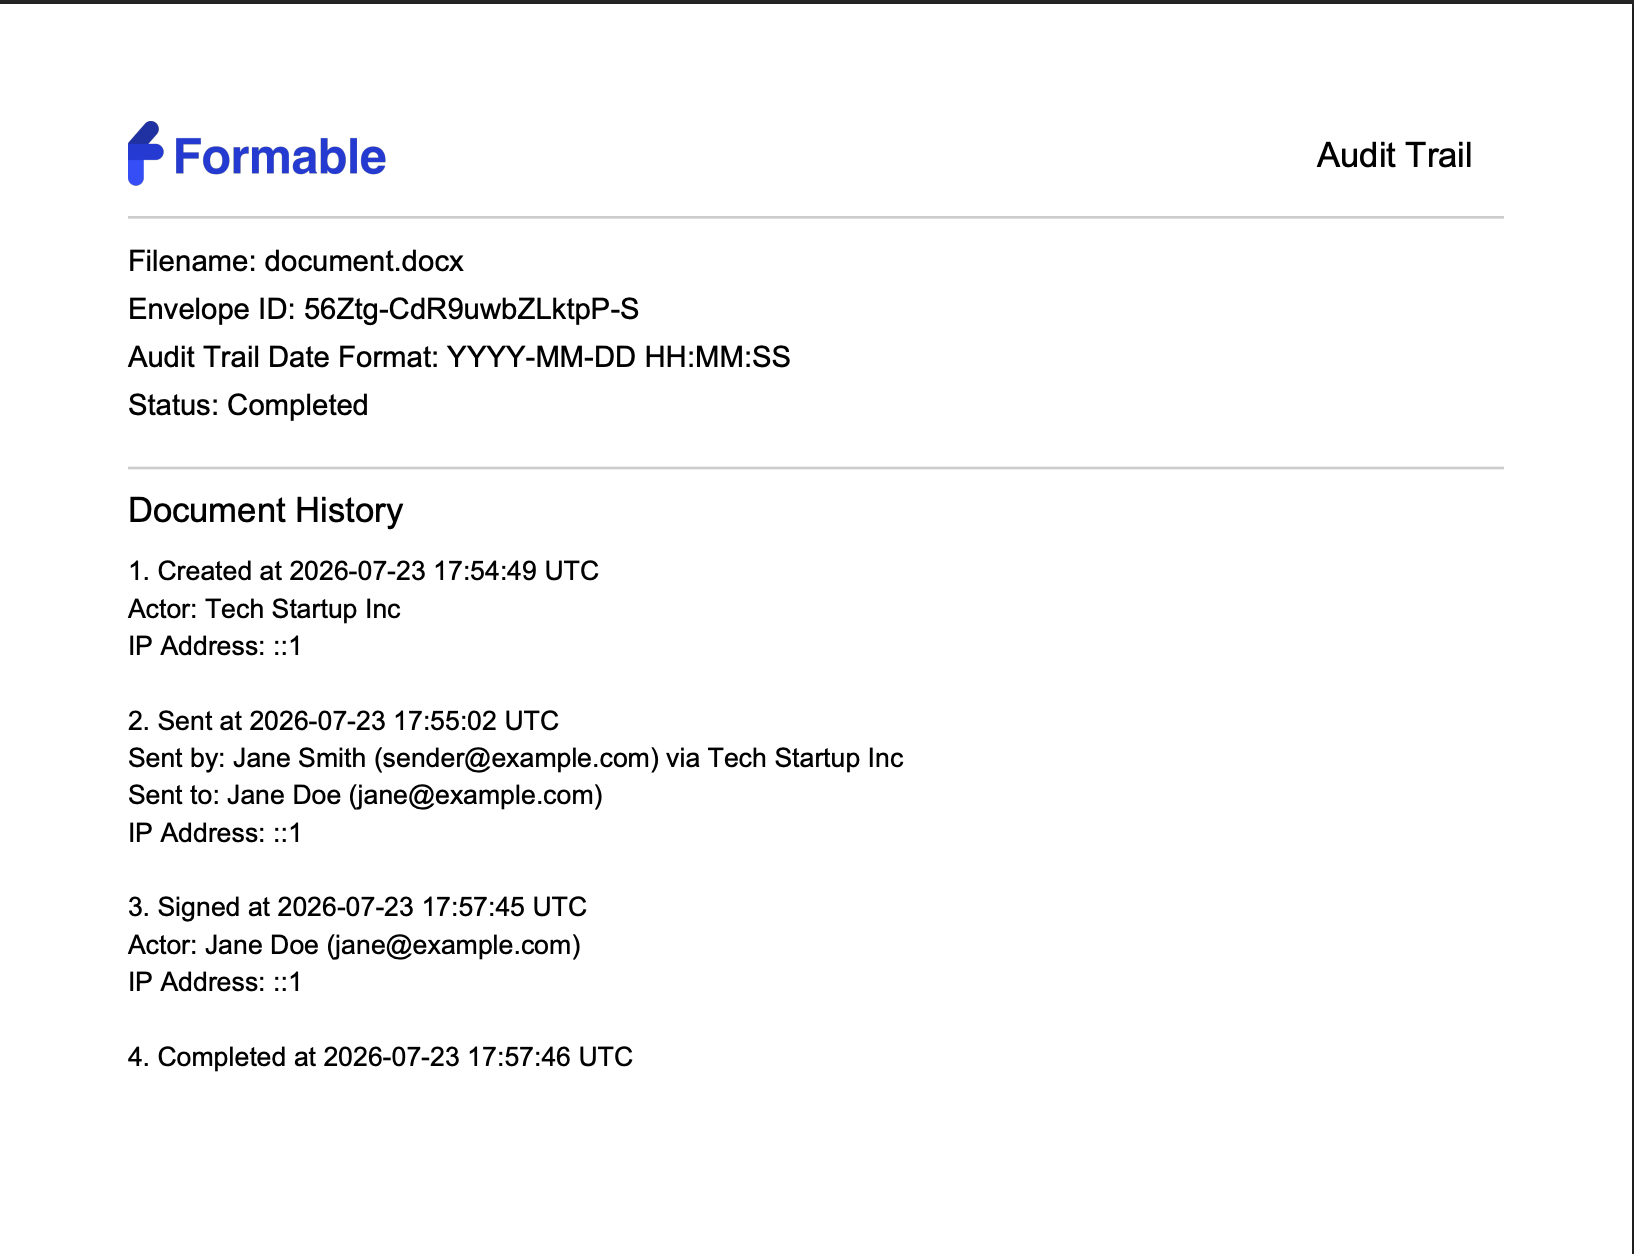
The signed envelope includes the Formable audit trail of all relevant events.
Error handling and test mode
Non-2xx responses raise a Formable::Error. A 409 from get_signed_envelope means the document is not finished:
begin
  FORMABLE.signature_requests.get_signed_envelope(signature_request_id)
rescue Formable::Error => error
  raise unless error.status == 409
  # wait for document_completed
end
400 is usually a field_id that is not on the template. 401 is the API key. 404 is an unknown id.
Set test_mode: true while you integrate. Test documents are watermarked, not legally binding, and do not count toward billing. Clear the flag for production.
Conclusion
Your Ruby service now owns signing end to end: a reusable template, email or embedded signing, a verified webhook, and a signed PDF with an audit trail stored on your side. The same controllers work whether the document is finance, HR, real estate, or anything else your app already creates.
To learn more about the Formable API, take a look at our API documentation. We support SDKs for a wide variety of languages, and are always looking to support more in the near future.
If you have questions, email matt@formabledocs.com. We are always happy to assist you!
FAQs
How do I add e-signatures to a Ruby application?
Install the formable gem, create a template from your PDF or DOCX, then create a signature request. Formable can email signers, or you can generate a signing URL and embed it in an iframe. A webhook tells you when to download the signed PDF.
Does the SDK depend on a web framework?
No. The gem is a Faraday client. The examples use Rails. Sinatra, Hanami, or a Sidekiq worker can call the same methods. Read request.raw_post on the webhook route, and skip verify_authenticity_token on that controller only.
How do I know when a document has been signed?
Handle document_completed on your webhook, or poll get until status is Completed.
Can I test without sending legally binding documents?
Yes. Set test_mode: true on signature requests. Test documents are watermarked, not legally binding, and do not count toward billing.
Does the signed PDF include an audit trail?
Yes. Every signed document includes an appended audit trail with created, sent, signed, and completed events, including timestamps, actors, and IP addresses, which supports enforceability under ESIGN and UETA.